How to Aerate a Clay Soil Lawn: A Practical Step-by-Step Guide
Published
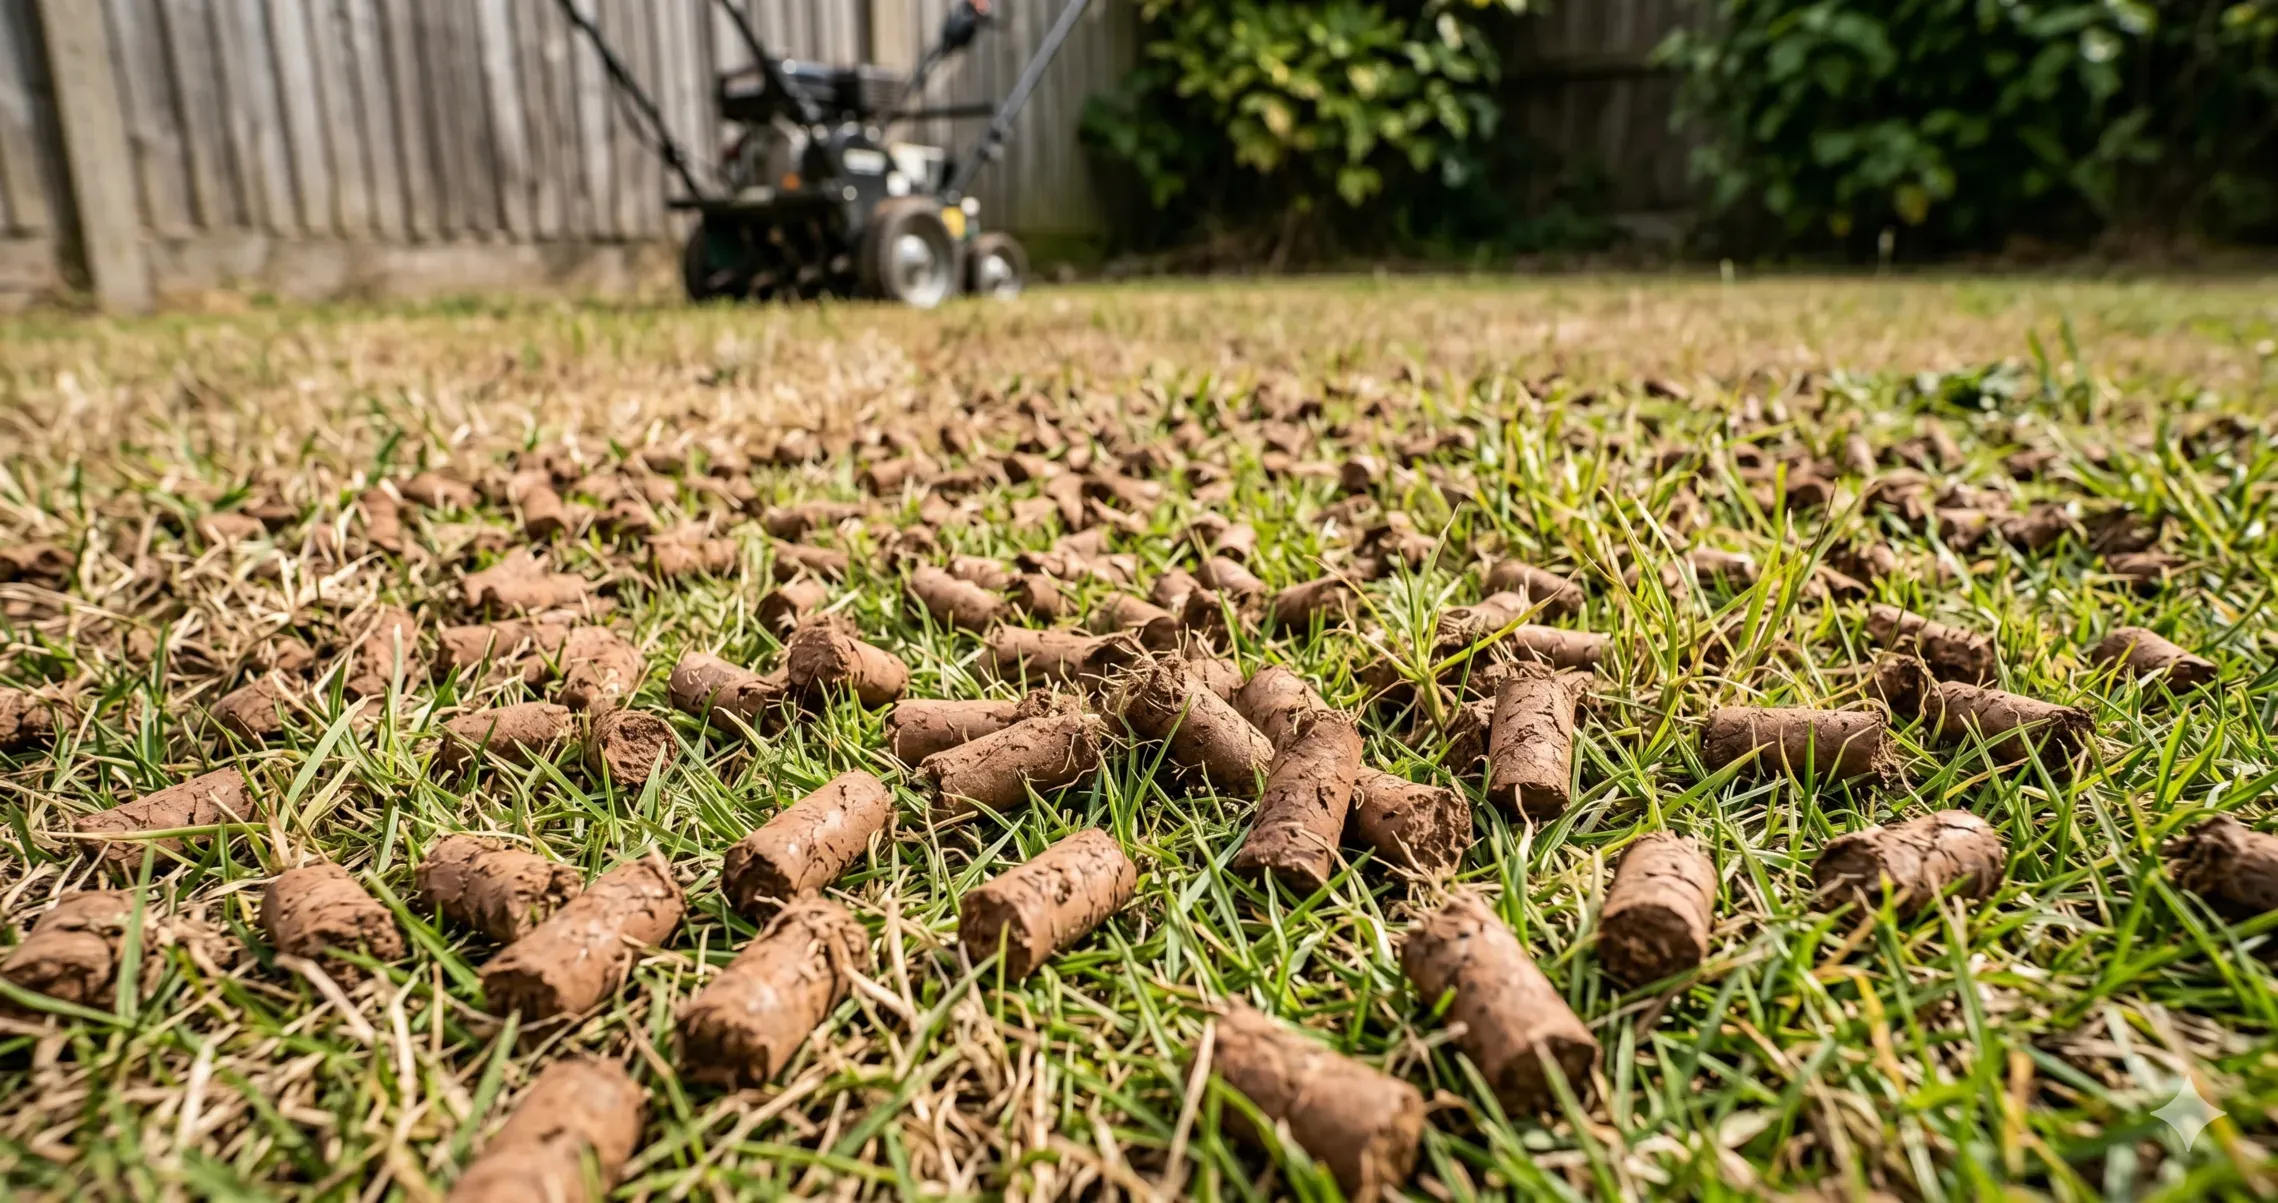
A clay lawn that stays hard underfoot can tempt you to rent an aerator straight away. First check the soil below the grass. Dry clay, a thick thatch layer, and a waterlogged low spot need different responses.
Once shallow compaction is the problem, the job is quite specific: remove soil plugs without churning up the lawn, then give the grass suitable conditions to recover. This guide covers that work on established turf.
Check whether aeration will help
Compare a worn route to the gate with a healthier, less-traveled area. Check when the soil is moderately moist, not baked dry or saturated. Locate shallow cables and irrigation before probing or lifting turf.
- Check resistance: Gently push a screwdriver or soil probe into several places. Persistent resistance in trafficked areas is a clue, not a definitive test. Dryness and buried objects also stop a probe. Do not force it past an abrupt obstruction.
- Look at the roots: Lift a small turf sample and compare rooting in the firm area with healthier turf. Restricted roots alongside repeated traffic and firm, moist soil strengthen the case for compaction. Replace the sample afterward.
- Look above the soil: A fibrous mat between the grass and mineral soil is thatch. Dethatching removes that material; aeration addresses the soil below it. Use our dethatching-versus-aeration checks if the surface feels spongy or both problems appear together.
If the soil admits a probe readily, roots look healthy, and the lawn is growing well, skip aeration. If water collects in a low spot, investigate its source and drainage before treating the lawn.
Choose a recovery window for your grass
Aerate during active growth, with enough favorable weather afterward for recovery. The season that suits one lawn may be wrong for another.
- Cool-season grass, including tall fescue, perennial ryegrass, and Kentucky bluegrass: late summer into early fall is often a useful window once summer stress has eased. Spring can also work during active growth. Avoid coring just before heat, drought, or winter shuts growth down.
- Warm-season grass, including bermudagrass and zoysia: plan for late spring or early summer after the lawn has greened up and is growing strongly. Do not carry a fall aeration schedule over from a cool-season lawn as warm-season grass approaches dormancy.
Use local grass-specific guidance and the forecast to choose the date. For warm-season turf, University of Georgia guidance uses soil at least 65°F (about 18°C) and warming at a 4-inch depth as a timing check. That is a regional guide alongside active growth, not a promise that every lawn is ready at one temperature.
Postpone work on frozen, saturated, dormant, or drought-stressed turf. A rental booking is not a reason to work unsuitable ground.
Match the equipment to the affected area
Choose hollow-tine or plug-removing equipment for compacted clay. Simple solid spikes, including aerator shoes, push soil aside without removing it. Our core-versus-spike comparison explains the difference in more detail.
A manual core aerator suits a few small patches where you can make repeated insertions without the job becoming exhausting. The manual core aerator comparison helps you choose by working motion and plug handling. For compaction across most of a lawn, a powered rental or lawn-care service is usually more practical.
If you are still weighing the scale of the job, compare manual, powered, and tow-behind core aerators before arranging equipment.
Check access through gates and whether you can safely transport and control the machine. Ask the rental provider to demonstrate operation, turning, stopping, and the machine’s slope limits. Choose help with the job if handling the equipment is beyond you.
Core aerate step by step
1. Clear the area and mark what the tines must miss
Remove toys, stones, and loose debris. Locate and mark sprinkler heads, shallow irrigation lines, cables, invisible dog fences, and robot-mower boundary wires. Leave those areas clear of the tines. If you cannot establish where something is buried, resolve that before proceeding.
Read the equipment manual, use its required protective gear, and keep children and pets out of the work area. Follow its instructions for lifting or disengaging the tines at turns and when crossing paving.
2. Check moisture below the grass
The tines need to enter moist soil and release a core. Wet grass alone tells you little about the soil a few inches down.
If the ground is dry, water ahead of the job and allow it to soak in, or wait for rain. Check again before starting rather than relying on a fixed watering duration. If clay sticks heavily, smears, or takes wheel ruts, let it dry further. Adding weight or force is not the answer to unsuitable moisture.
3. Test a short strip and inspect the plugs
Work a small, unobstructed area first. Stop and look for actual soil cylinders on the surface. Mere punctures, torn sod, or repeated clogging are reasons to pause and check moisture, tine condition, and the machine settings.
For ordinary shallow lawn compaction, about 2–3 inches (5–8 cm) of penetration is a useful practical reference. Colorado State’s lawn-aeration guidance pairs that depth with holes roughly 2–4 inches apart. Actual depth depends on the equipment and soil; a listed tine length is not a guaranteed core length.
Measure several extracted plugs. If you are barely scratching the surface, check conditions before continuing across the yard. A compacted layer below the equipment’s reach needs separate assessment, not endless shallow passes.
4. Cover the compacted area and check the gaps
Work in an orderly pattern so you can see which ground you have covered. One pass often leaves too much untouched soil. Where the manual and terrain allow, another pass across the first direction can improve coverage.
Use the hole pattern as a check rather than insisting on a fixed number of passes. Illinois Extension suggests 15–20 cores per square foot for its lawn guidance, while other extension recommendations differ. The useful point is to remove plugs throughout the affected area, not leave widely separated rows or keep working turf that is tearing up.
With a hand tool, offset each insertion to work fresh soil. If tines stop releasing plugs, stop and clear them using the tool’s instructions. Shut down powered equipment and follow its maintenance precautions before touching the working parts.
5. Leave the cores to dry
Leave extracted soil on the lawn to dry and break apart. Once dry, ordinary mowing can help crumble the plugs. There is no need to collect them simply to make the lawn look tidy, and no need to fill every hole with bought material.
Help the lawn recover
Check moisture after the job and water if conditions are dry. Keep irrigation within the soil’s ability to absorb it; stop or split applications when water runs off. Our clay-lawn watering guide covers adjusting irrigation to the site.
Reduce repeated traffic through the treated patches, especially while the ground is wet. If the same route to the shed keeps wearing out, a path may be a more durable solution than repeatedly repairing grass.
Fertilizer and topdressing are separate decisions. Follow a soil test and a grass-appropriate nutrient plan rather than adding fertilizer automatically after coring. Aeration does not require a sand or compost dressing. For broader soil improvement, see the compacted-clay repair plan.
If a thin cool-season lawn also needs seed, coordinate the work with a suitable establishment window. Our fall overseeding guide covers seed contact and the different watering needs of seedlings. You do not need to overseed healthy turf just because you aerated it.
Reassess after the lawn has resumed growth. Compare turf condition, rooting, and soil resistance at similar moisture, and check whether traffic is recreating the problem. There is no universal annual or twice-yearly schedule for every clay lawn.
When more aeration is the wrong next step
Puddles keep returning to the same low area: coring does not create a drainage outlet or correct grade. Follow the standing-water diagnosis before booking another visit.
Heavy machinery left deep ruts or buried compaction: a normal lawn aerator cannot loosen a layer it never reaches. Get the depth and repair options assessed; the heavy-equipment damage guide is the better starting point.
Grass is thinning for another reason: shade, unsuitable mowing, drought, pests, and disease will not be corrected by removing soil plugs. If the cause remains unclear, take photos and a turf sample to a local extension service or horticultural adviser before disturbing more lawn.